Hi Bella Babes! Let’s get into this comprehensive guide on achieving perfect lash lift for your clients. Lash lifts have gained immense popularity, making them a valuable addition to your service offerings. Whether your clients are newcomers to the world of lashes or seeking a more natural look, mastering these tips and tricks will ensure excellent results. Let’s dive into the key aspects of achieving flawless lash lifts.
Proper Taping Techniques:
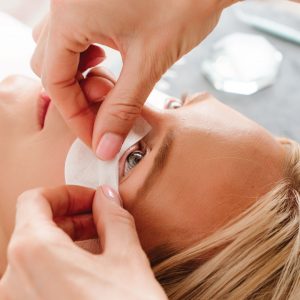
Taping is a crucial step in ensuring precise and effective lash lift application. There are several tape methods to consider. The first technique is the “lid pull,” where tape is applied to the eyelid to gently pull the excess skin upward. This method proves highly beneficial for clients with mature eyelids. Another useful approach is placing tape over the top lashes, allowing you to position the silicone lash pad closer to the lash line. Additionally, applying tape over the area where the silicone lash pad will be placed can help avoid adhesive residue on the client’s skin once the pad is glued. These taping techniques enhance your overall application process.
Understanding Processing Time:
An essential factor in achieving successful lash lifts is understanding the appropriate processing time for the lifting solutions. Different lash types require varying processing times for optimal results. Thinner lashes demand a shorter processing time, whereas more coarse lashes may need a longer duration. Always adhere to the processing time guidelines provided on the lifting solution bottle to ensure you attain the desired lift without compromising the health of your client’s lashes.
Applying Adhesive Wisely:
Make sure to not overuse the adhesive when attaching the lashes to the pad. Excessive adhesive can coat the lashes, hindering the effectiveness of the lifting solution. If you suspect that you have used too much adhesive, gently brush the lashes with a wet cotton swab to remove any excess. This ensures that the lifting solution can adequately penetrate the lashes, producing a stunning lift.
Selecting the Right Size:
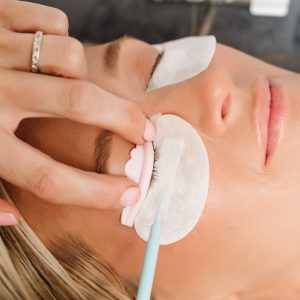
Proper sizing of the silicone lash pad is essential in achieving the desired curl. Using the correct size ensures that lashes do not curl excessively or lack sufficient lift. For clients with shorter lashes, opt for a smaller rod, while for those with longer lashes, a larger rod would be more suitable. Accurate sizing of the lash pad will significantly impact the final shape of the curl.
Precise Product Placement:
The way you apply the product during the lash lift process is vital to achieving optimal results. Ensure that the lifting solution is placed from the root to the middle of the lashes. Avoiding contact with the lash tips. Applying a sufficient amount and covering the lashes with plastic wrap aids in achieving an even lift. Be cautious not to let the solution come into contact with the lash tips, as it may cause over-processing the lashes. For clients with stubborn lashes, a wipe the excess solution on the tips, leaving it on for only one minute, can be beneficial.
Final Thoughts:
Congratulations! You are now equipped with valuable tips and techniques to master the art of lash lifts. Remember to apply precise taping, understand processing times, use adhesive wisely, select appropriate sizes, and practice precise product placement. By following these guidelines; you’ll confidently offer impeccable lash lift services that will leave your clients feeling even more beautiful and satisfied with their natural-looking, lifted lashes. Happy lashing!